讓 Claude Code 完成時自動通知你:macOS 原生 + Telegram 推播設定指南
不想一直盯著終端機等 Claude Code 跑完?在 3 分鐘內設定 Notification Hook。用 osascript 顯示 macOS 原生桌面通知,再用 curl 呼叫 Telegram 推播訊息到手機。
本文涵蓋兩種通知方式與兩種設定方法:
| macOS 原生通知 | Telegram 推播 | |
|---|---|---|
| 離開電腦也能收到 | ❌ | ✅ |
| 設定難度 | 簡單 | 需要 bot token |
| 適合場景 | 一般開發 | 跨裝置、遠端工作 |
通知方式介紹
方式 A:macOS 原生通知(osascript)
osascript 是 macOS 內建的命令列工具,可直接從終端機執行 AppleScript 等自動化腳本。
只需要一行指令,就能讓系統跳出通知:
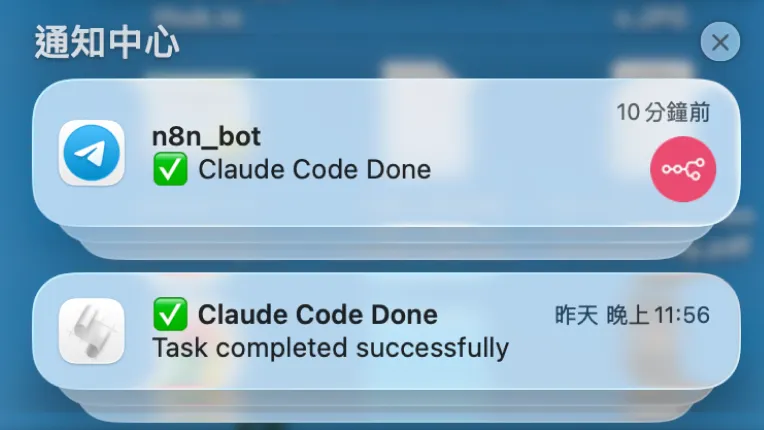
osascript -e 'display notification "Task completed successfully" with title "✅ Claude Code Done"'不需要任何額外安裝,macOS 原生支援。
方式 B:Telegram 推播(curl)
curl 是內建於 macOS 的 CLI 工具,不需要圖形介面即可連線至網路伺服器並傳送資料。
適合需要離開電腦、或希望在手機上收到通知的場景。使用 macOS 預裝的 curl,不需要安裝任何額外 runtime,一行指令直接呼叫 Telegram Bot API:
curl -s -X POST "https://api.telegram.org/bot$TELEGRAM_BOT_TOKEN/sendMessage" \
  -d chat_id="$TELEGRAM_CHAT_ID" \
  -d text="✅ Claude Code Done"
前置作業:設定 Telegram Bot
在設定 hook 之前,先完成 Telegram 的前置作業。
Step 1:建立 Telegram Bot
在 Telegram 搜尋 @BotFather,傳送 /newbot,按照指示建立 bot 並取得 BOT_TOKEN。
Step 2:取得你的 Chat ID
傳任意訊息給你剛建立的 bot,然後在瀏覽器開啟:
https://api.telegram.org/bot<YOUR_BOT_TOKEN>/getUpdates在回傳的 JSON 中找到 "chat": {"id": ...} 的數字,那就是你的 CHAT_ID。
設定方法
Claude Code 的 hooks 功能讓你在特定事件發生時自動執行 shell 指令。我們要用的是 Stop 事件,也就是 Claude Code 完成任務、停止回應的時機。
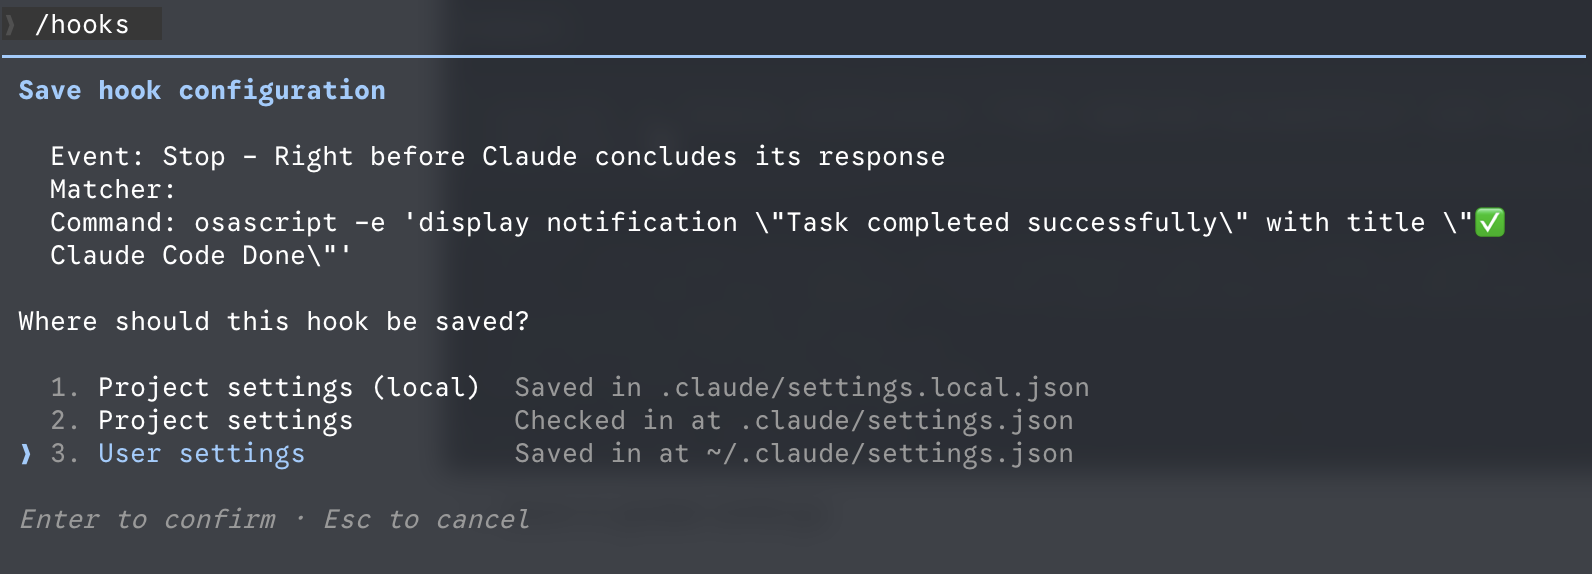
方法 1:透過 /hooks 指令(推薦新手)
這是最直覺的方式,不需要手動編輯任何設定檔。
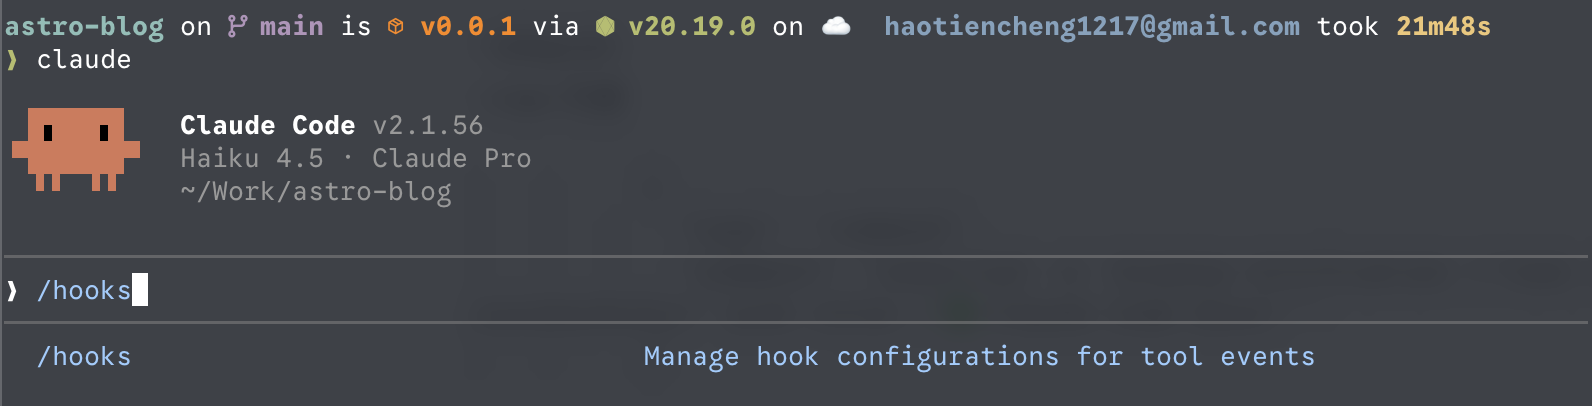
Step 1: 在 Claude Code session 中執行 /hooks 指令
Step 2: 選擇 Stop 事件,按 Enter 確認
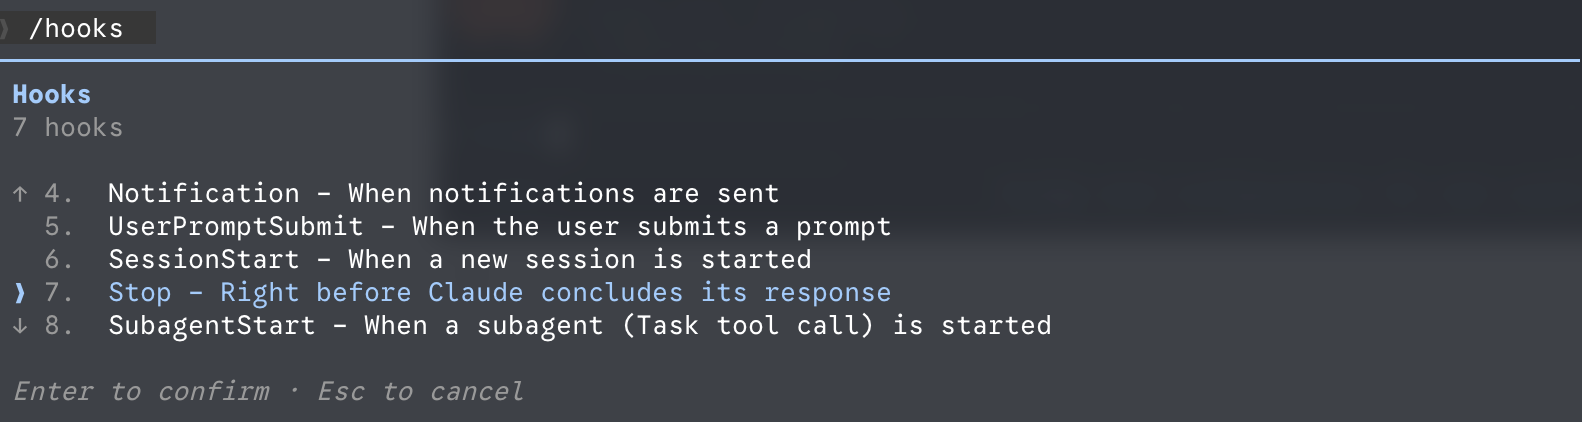
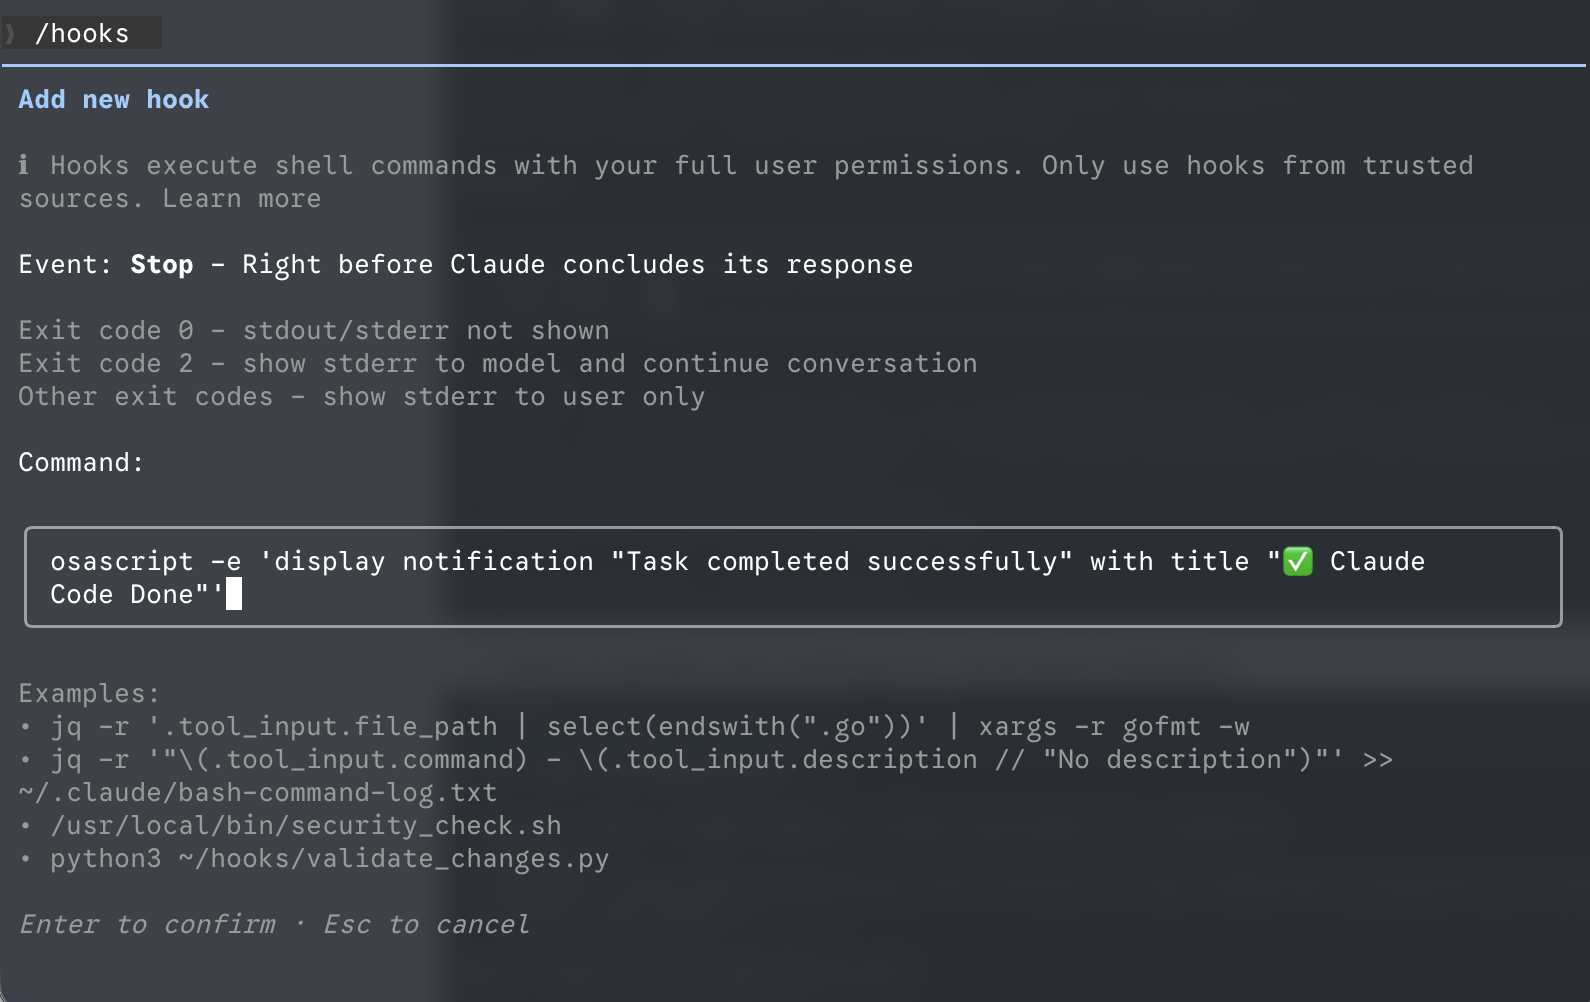
Step 3: 選擇 + Add new hook...

Step 4: 在 command 輸入欄貼上你想要的通知指令
macOS 原生通知:
osascript -e 'display notification "Task completed successfully" with title "✅ Claude Code Done"'或 Telegram 推播:
curl -s -X POST "https://api.telegram.org/bot$TELEGRAM_BOT_TOKEN/sendMessage" -d chat_id="$TELEGRAM_CHAT_ID" -d text="✅ Claude Code Done"Hint: 記得將
$TELEGRAM_BOT_TOKEN以及$TELEGRAM_CHAT_ID替換成剛剛記下的 token 以及 ID
Step 5: 儲存至 global user settings(建議選這個,讓所有專案都套用)
Step 6: 用一個簡單的 prompt 測試看看

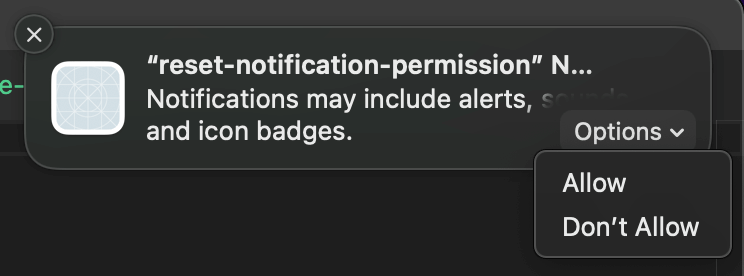
Step 7: 第一次使用 osascript 時系統可能會跳出權限詢問,點 Allow 即可,之後就不會再問了
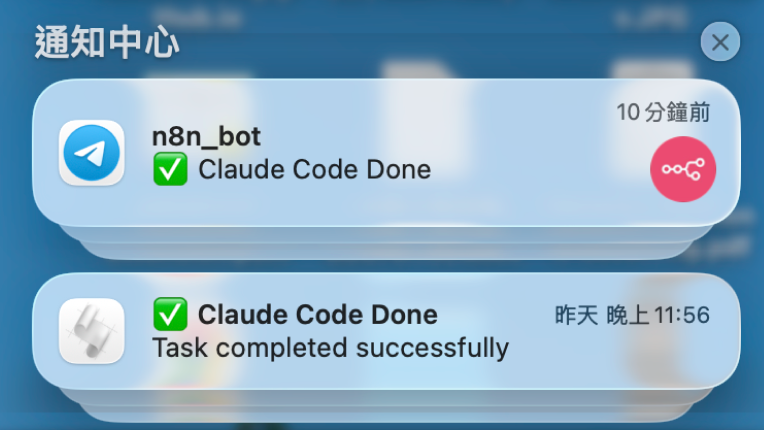
Step 8: 完成!Claude Code 跑完後通知就會跳出來
方法 2:直接編輯 .claude JSON 設定檔
如果你偏好直接編輯設定檔,或者想同時設定多個 hooks,這個方式更有效率。
設定檔位置:
| 範圍 | 路徑 |
|---|---|
| 全域(所有專案) | ~/.claude/settings.json |
| 專案共用 | .claude/settings.json |
| 個人本地 | .claude/settings.local.json |
可以在 terminal 輸入指令打開設定檔
open ~/.claude/settings.json開啟設定檔,加入以下 JSON:
{
  "hooks": {
    "Stop": [
      {
        "hooks": [
          {
            "type": "command",
            "command": "osascript -e 'display notification \"Task completed successfully\" with title \"✅ Claude Code Done\"'"
          },
          {
            "type": "command",
            "command": "curl -s -X POST \"https://api.telegram.org/bot$TELEGRAM_BOT_TOKEN/sendMessage\" -d chat_id=\"$TELEGRAM_CHAT_ID\" -d text=\"✅ Claude Code Done\""
          }
        ]
      }
    ]
  }
}
Hint: 記得將
$TELEGRAM_BOT_TOKEN以及$TELEGRAM_CHAT_ID替換成剛剛記下的 token 以及 ID
這個設定會在 Claude Code 完成時同時觸發兩種通知,你也可以只保留其中一個。
注意: JSON 中的雙引號需要跳脫(
\"),直接複製上方範例即可,不需要手動處理。
小結
設定完成後,你就可以放心去泡咖啡、開會、甚至離開電腦,Claude Code 跑完自然會通知你。
- 只在 Mac 旁邊工作 → 用
osascript,一行指令搞定,不需任何額外設定 - 需要跨裝置或遠端收通知 → 用
curl呼叫 Telegram API,同樣零依賴,macOS 內建 - 兩個都想要 → 直接用方法 2 編輯 JSON,同時設定兩個 hooks,一次到位